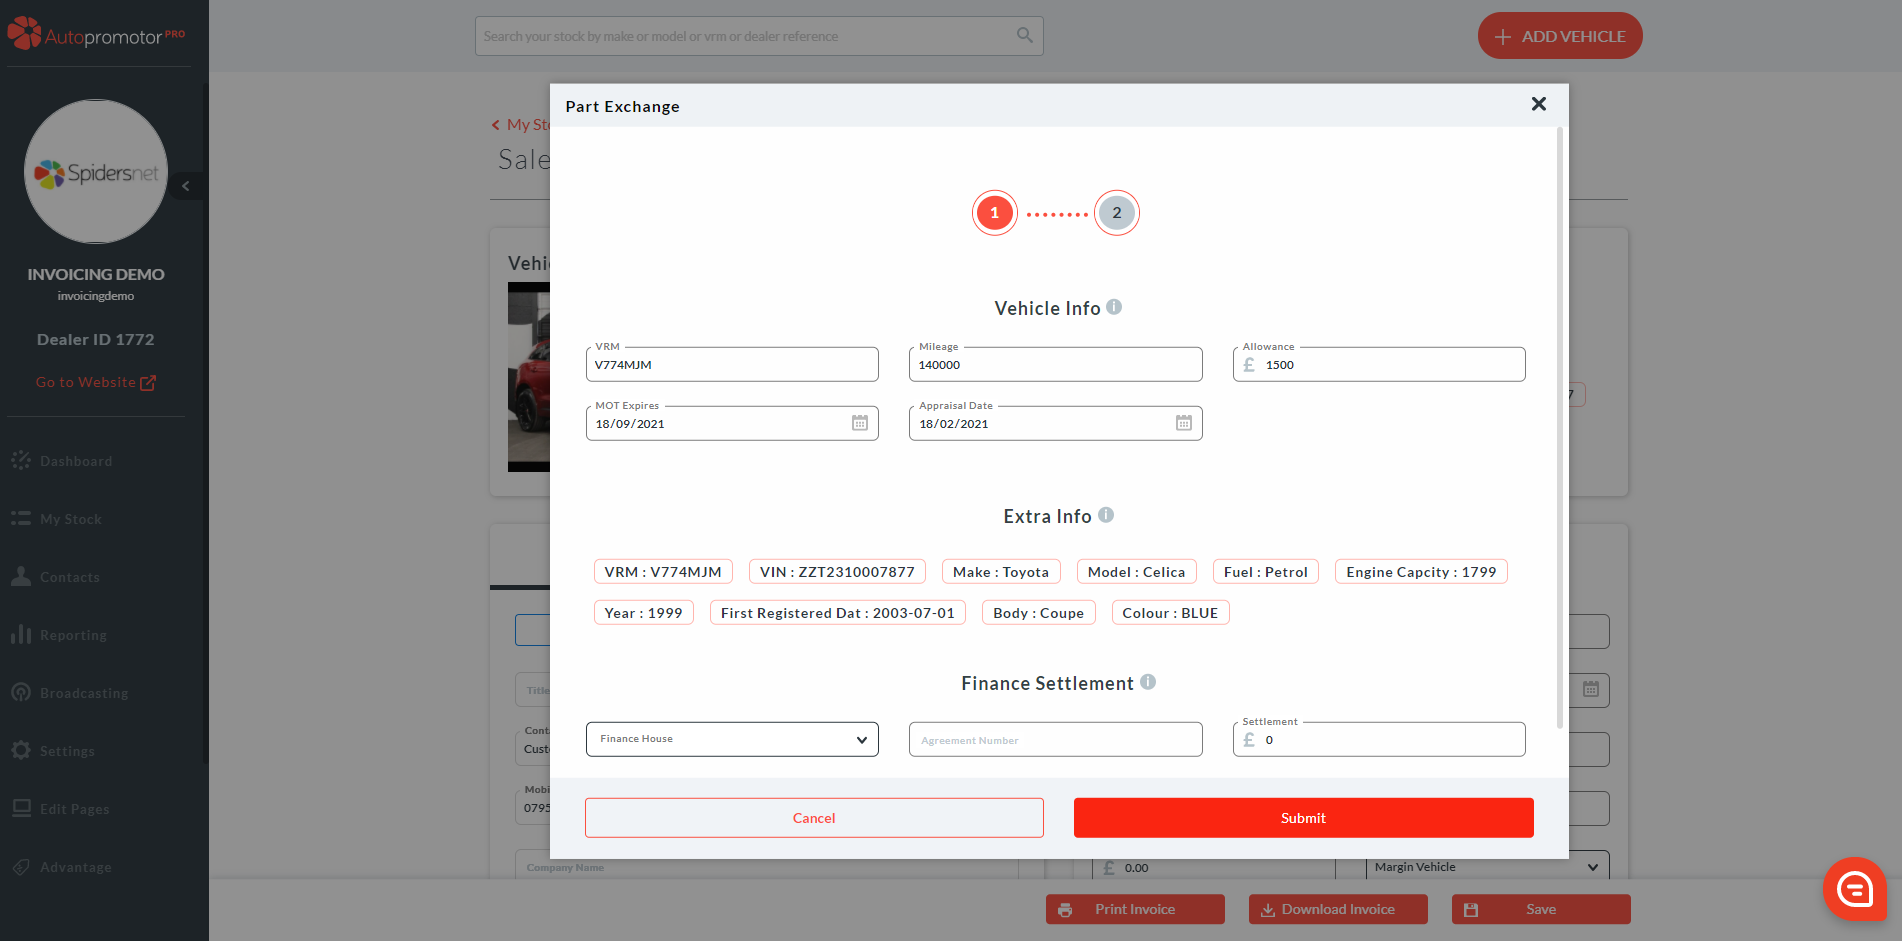
This handy tool is for when you decide you want to sell on any part exchange vehicle.
Step-by-Step Guide:
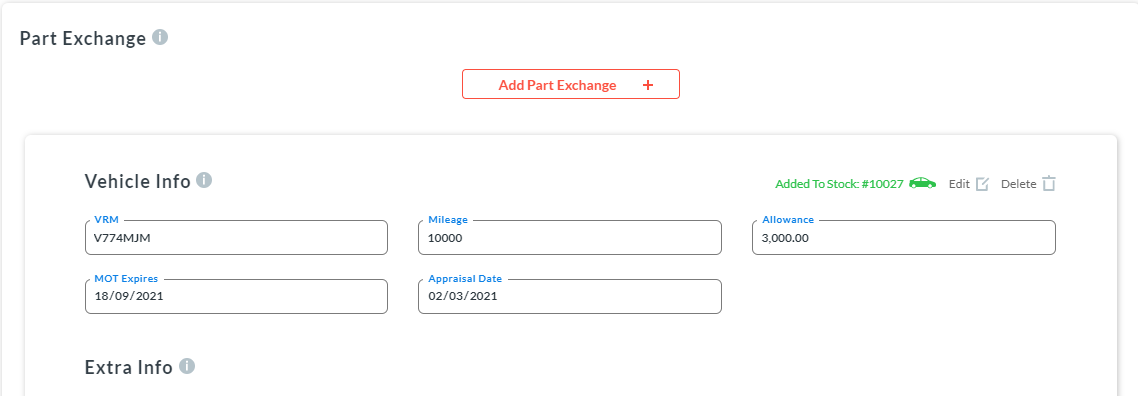
- Add and complete the part exchange vehicle information and submit.
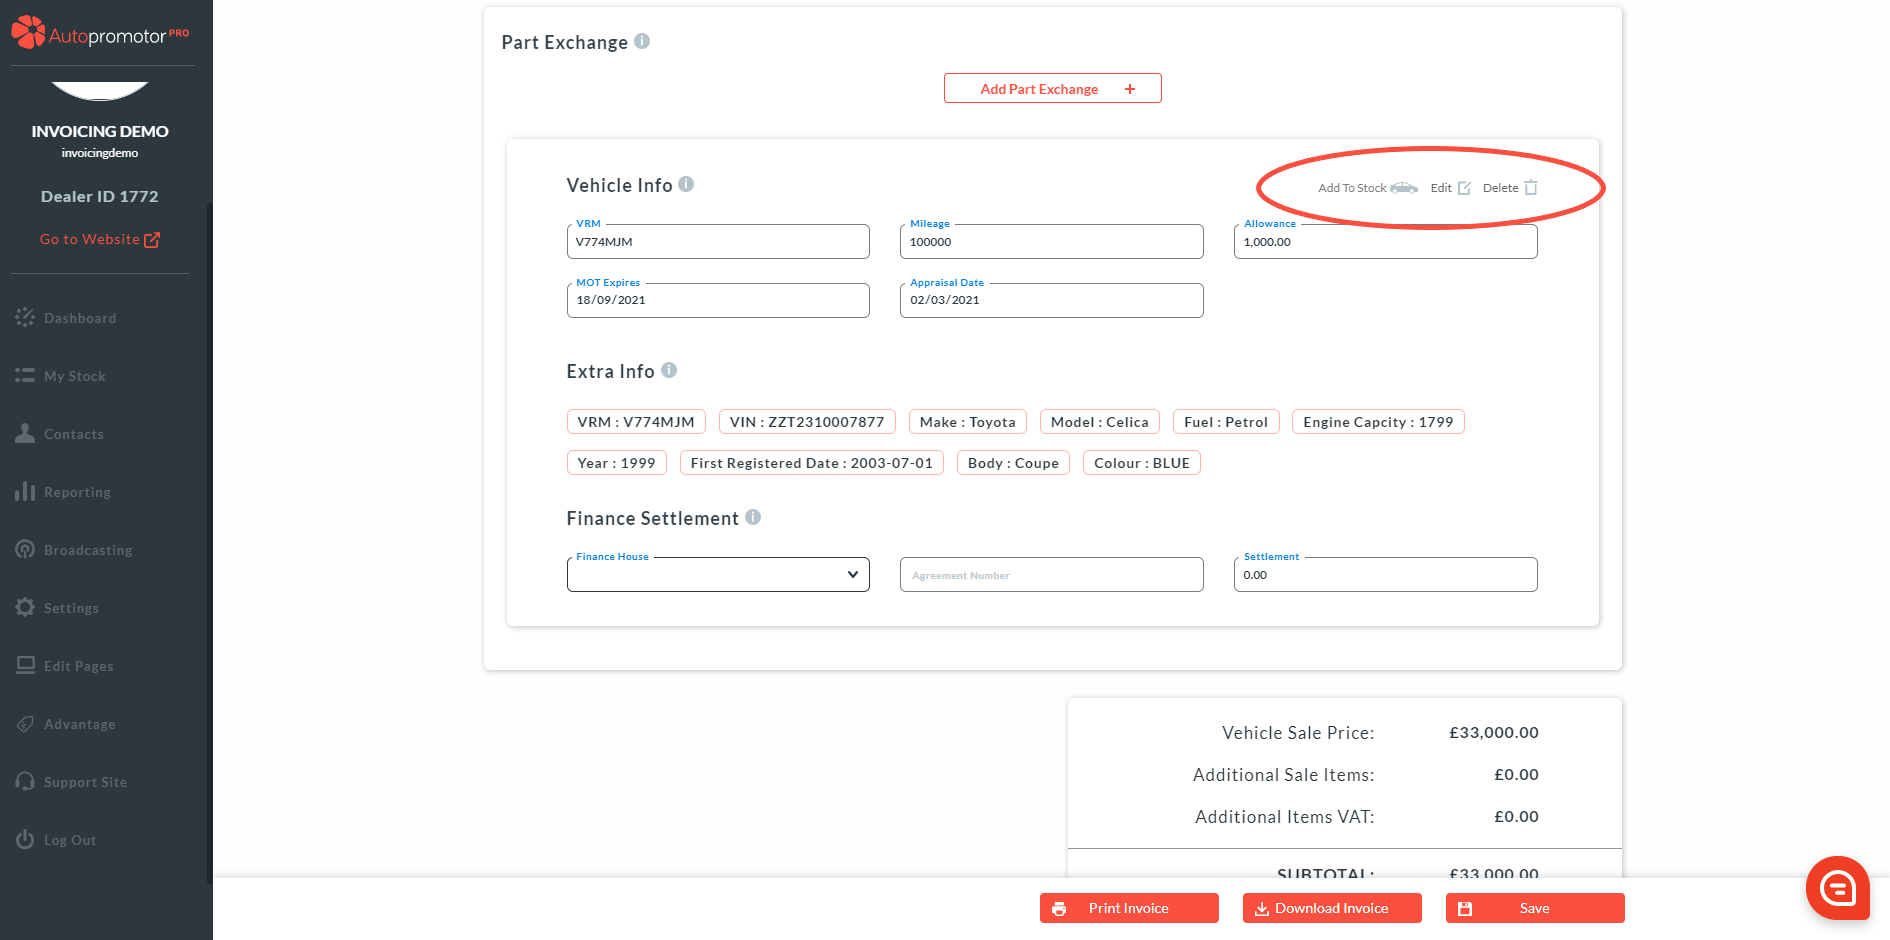
2. Click on ‘Add to Stock’ in the upper right corner of the vehicle info box on the sales invoice.
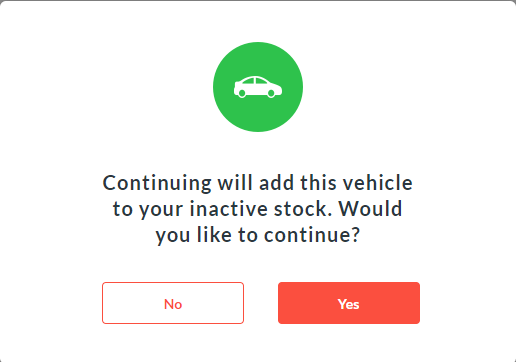
3. A pop-up will appear – click on ‘Yes’.
4. The ‘Add to Stock’ button will then go green, and a stock ID number will show.
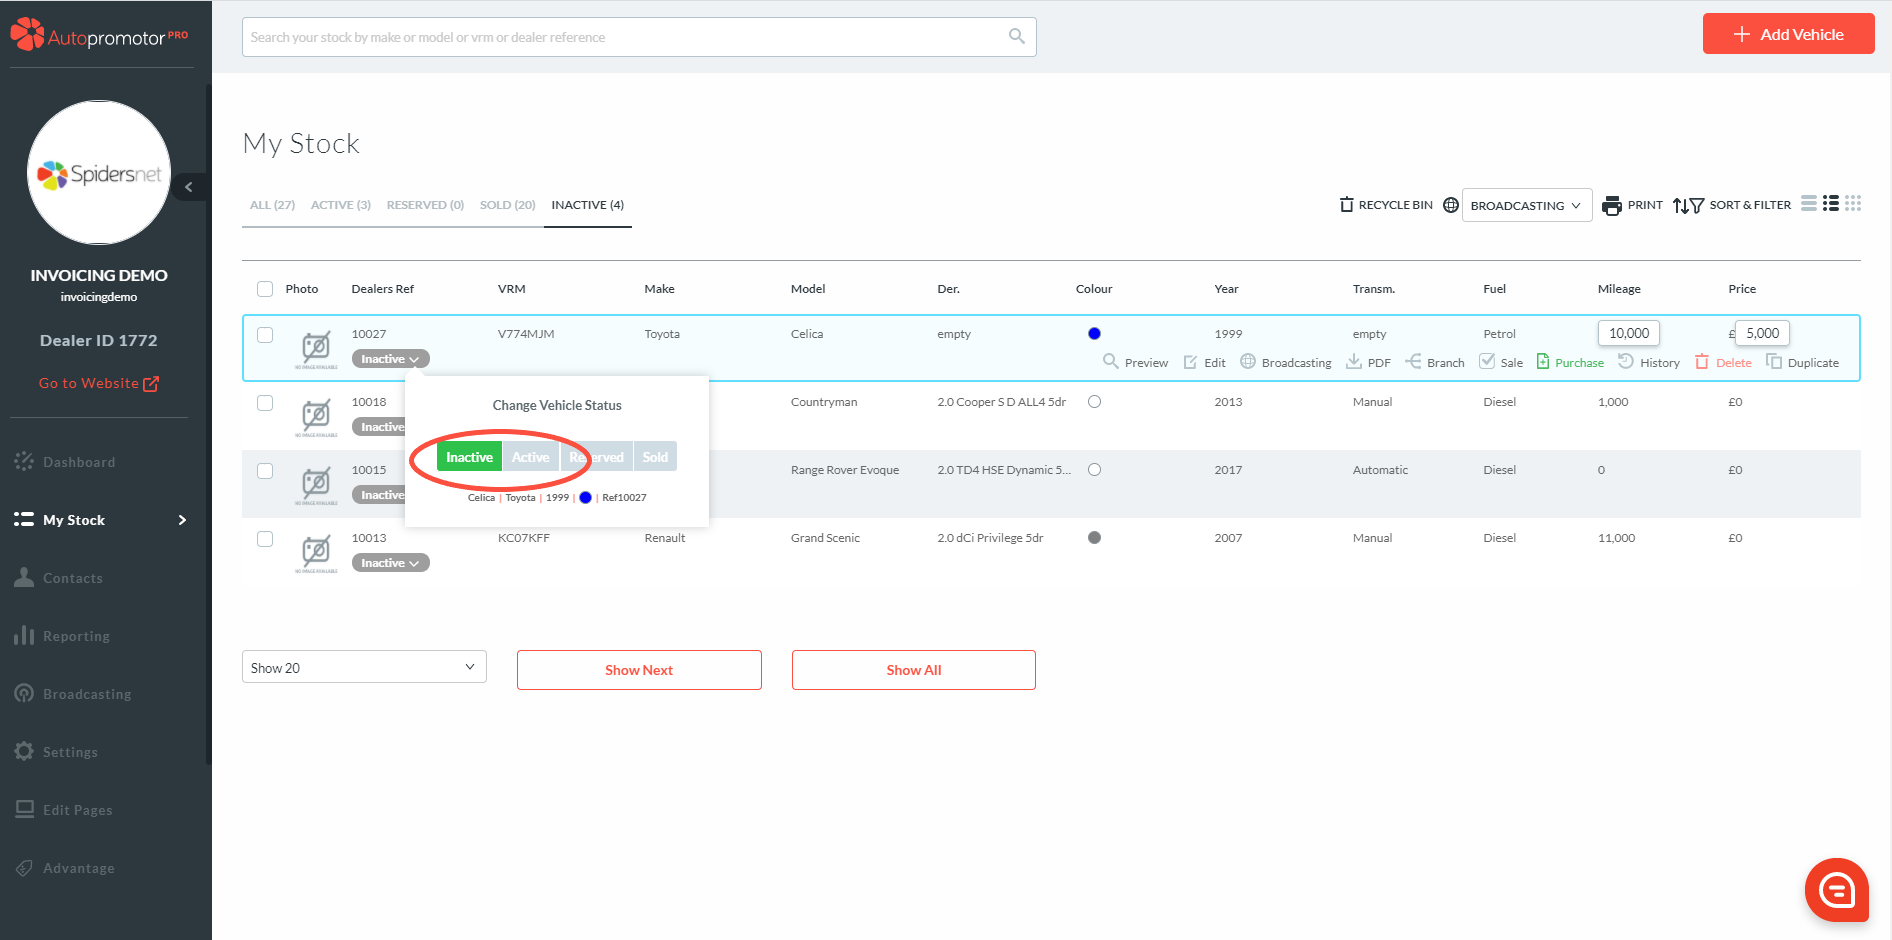
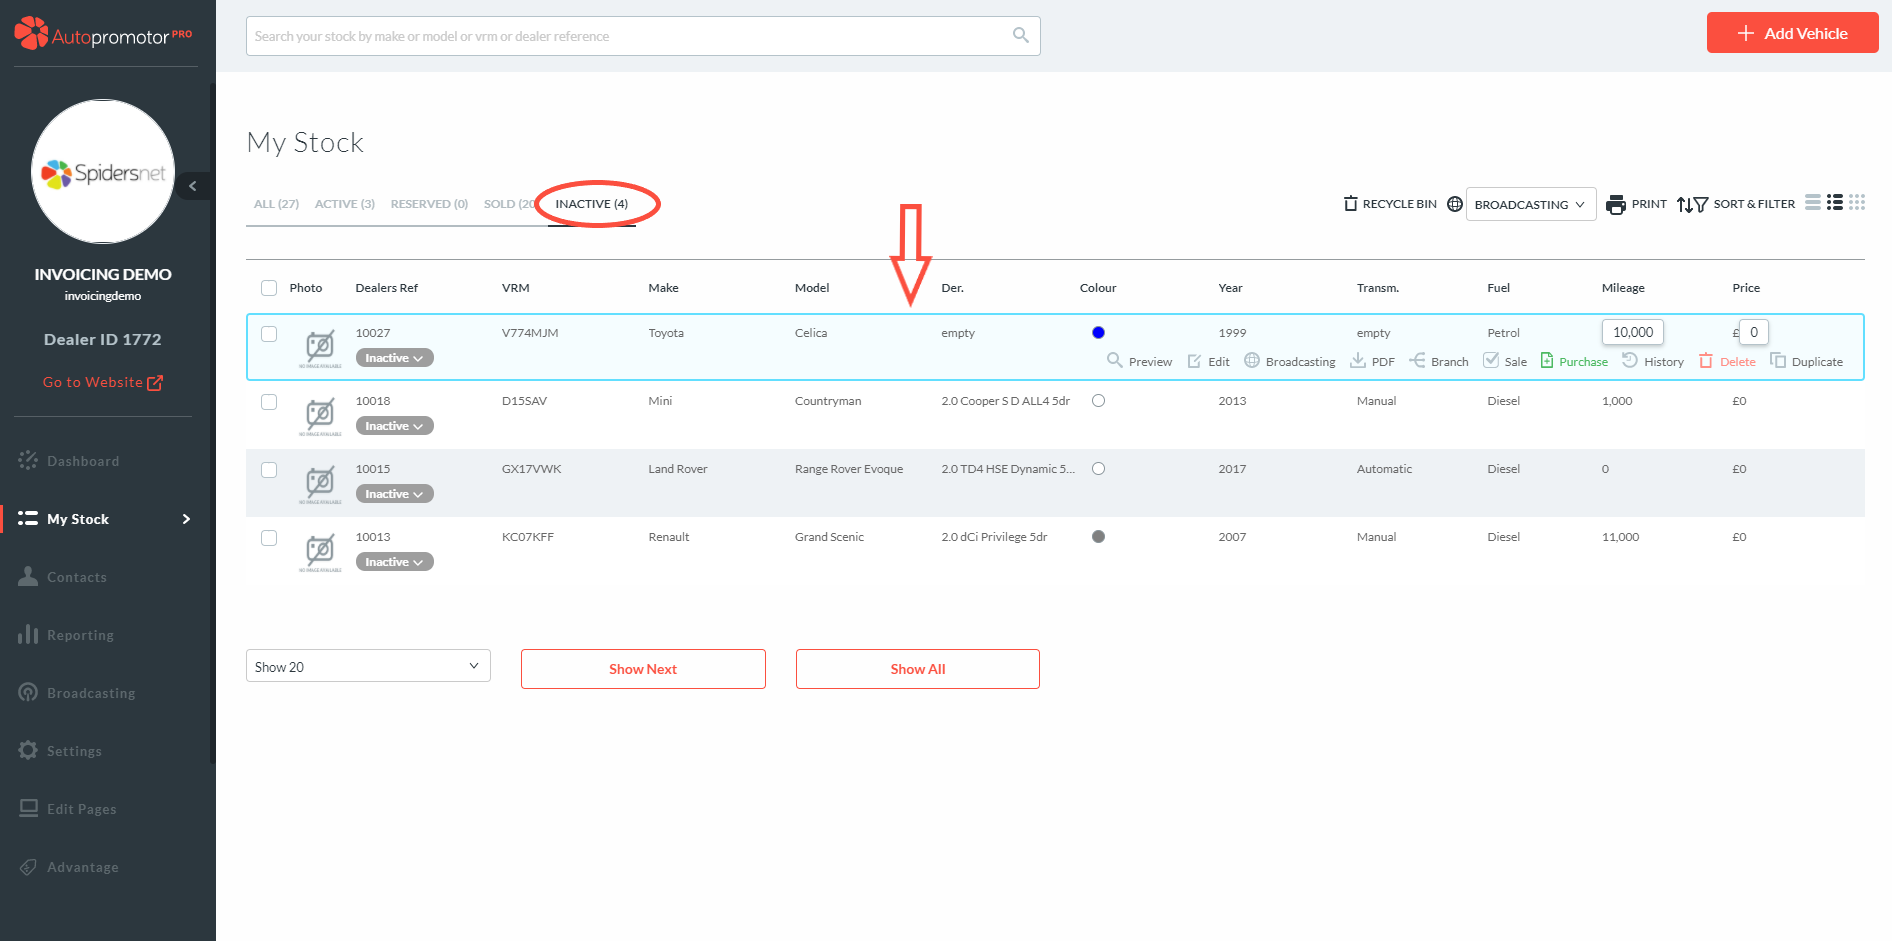
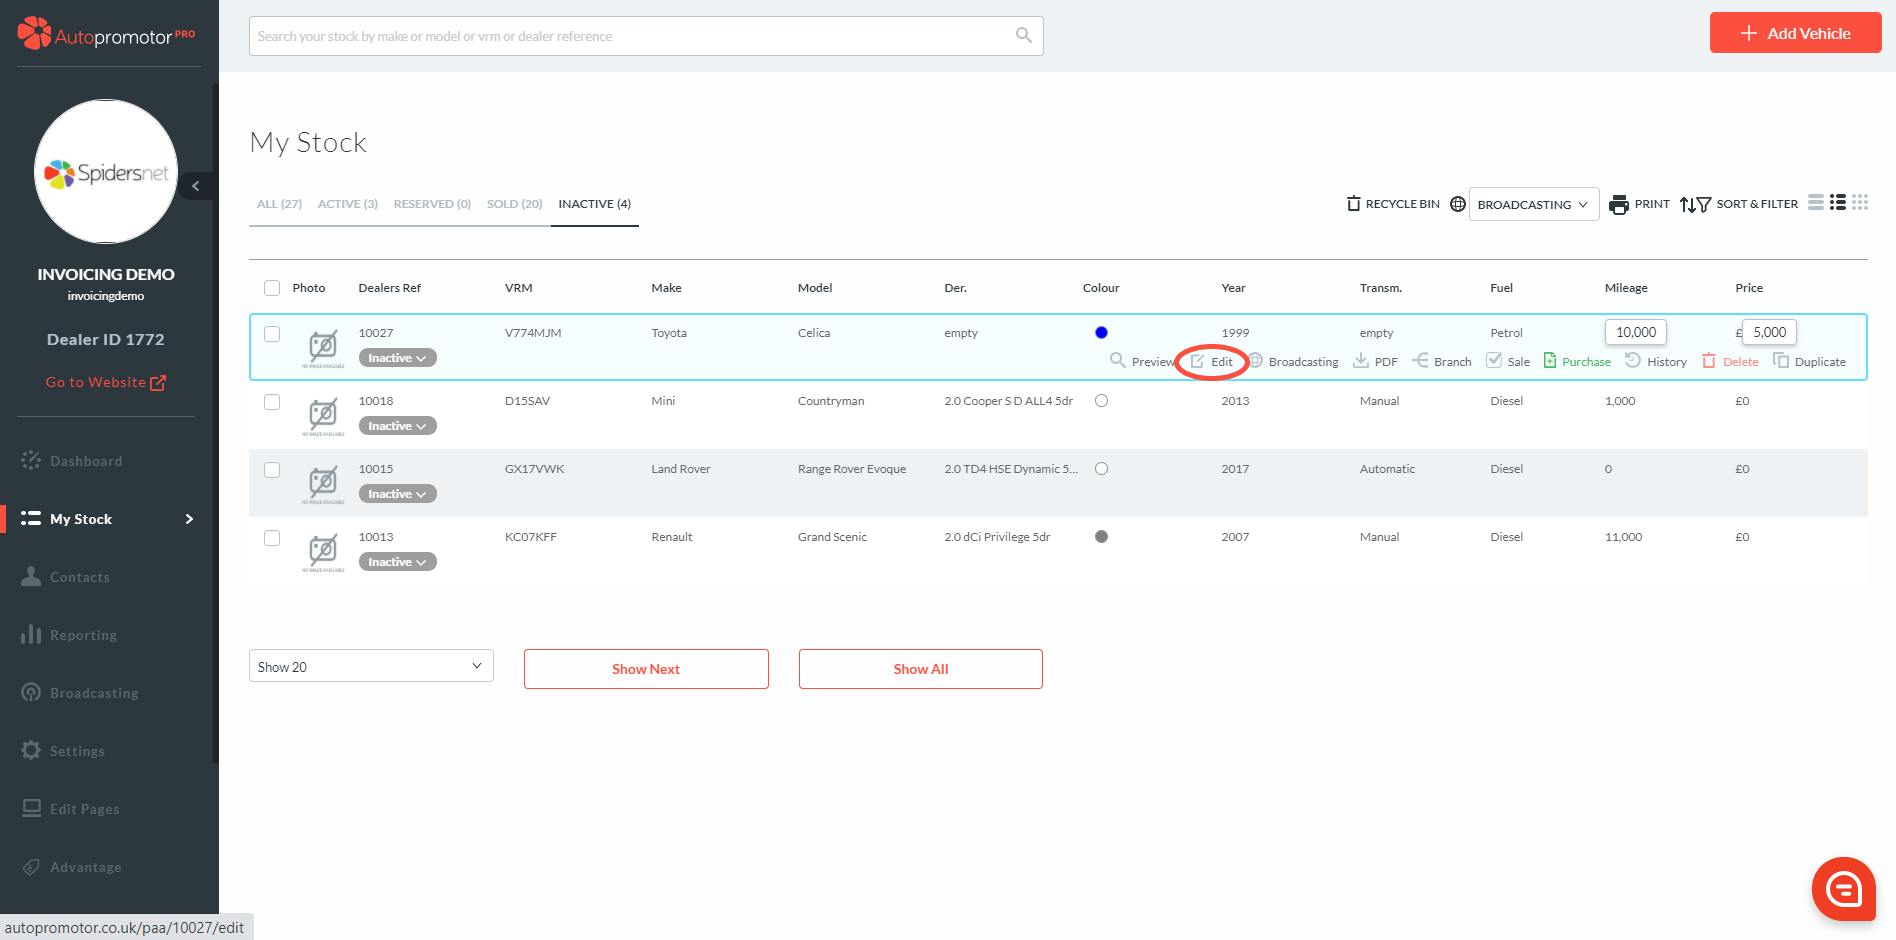
5. When you have completed the sales invoice, you can then find the new part exchange vehicle on the ‘My Stock’ page under ‘Inactive’. The vehicle will appear at the top of the list.
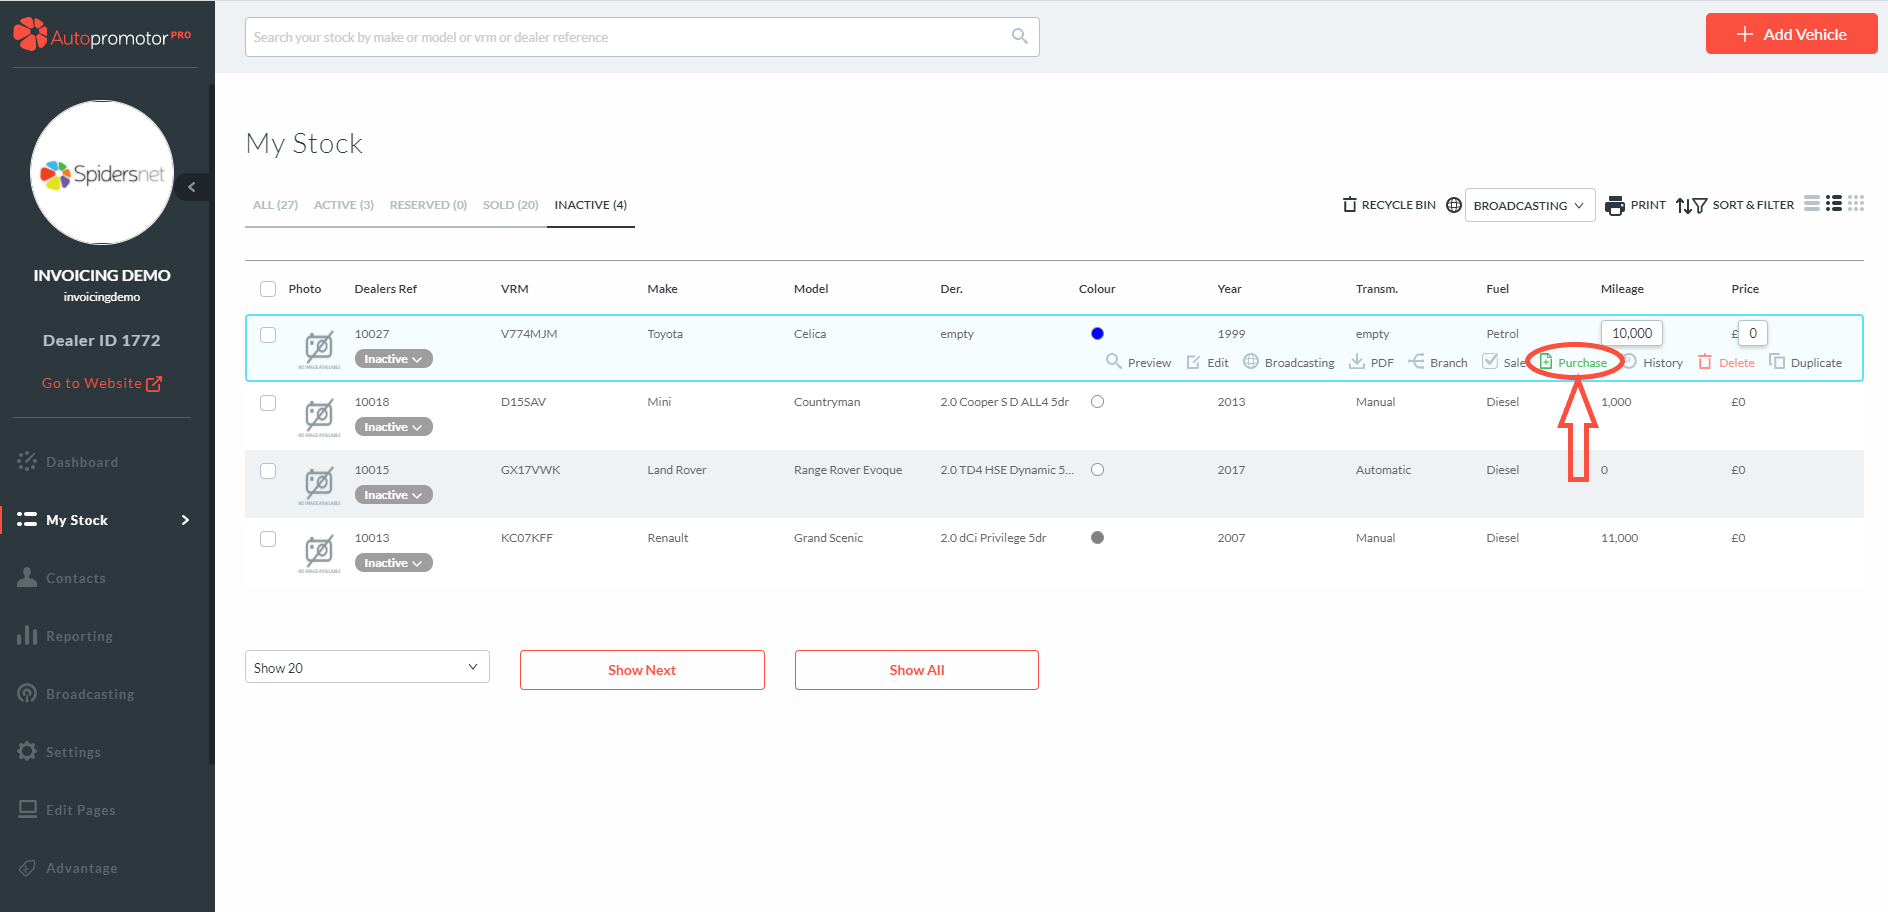
6. With the vehicle highlighted click on ‘Purchase’ to add in any vehicle preparation information.
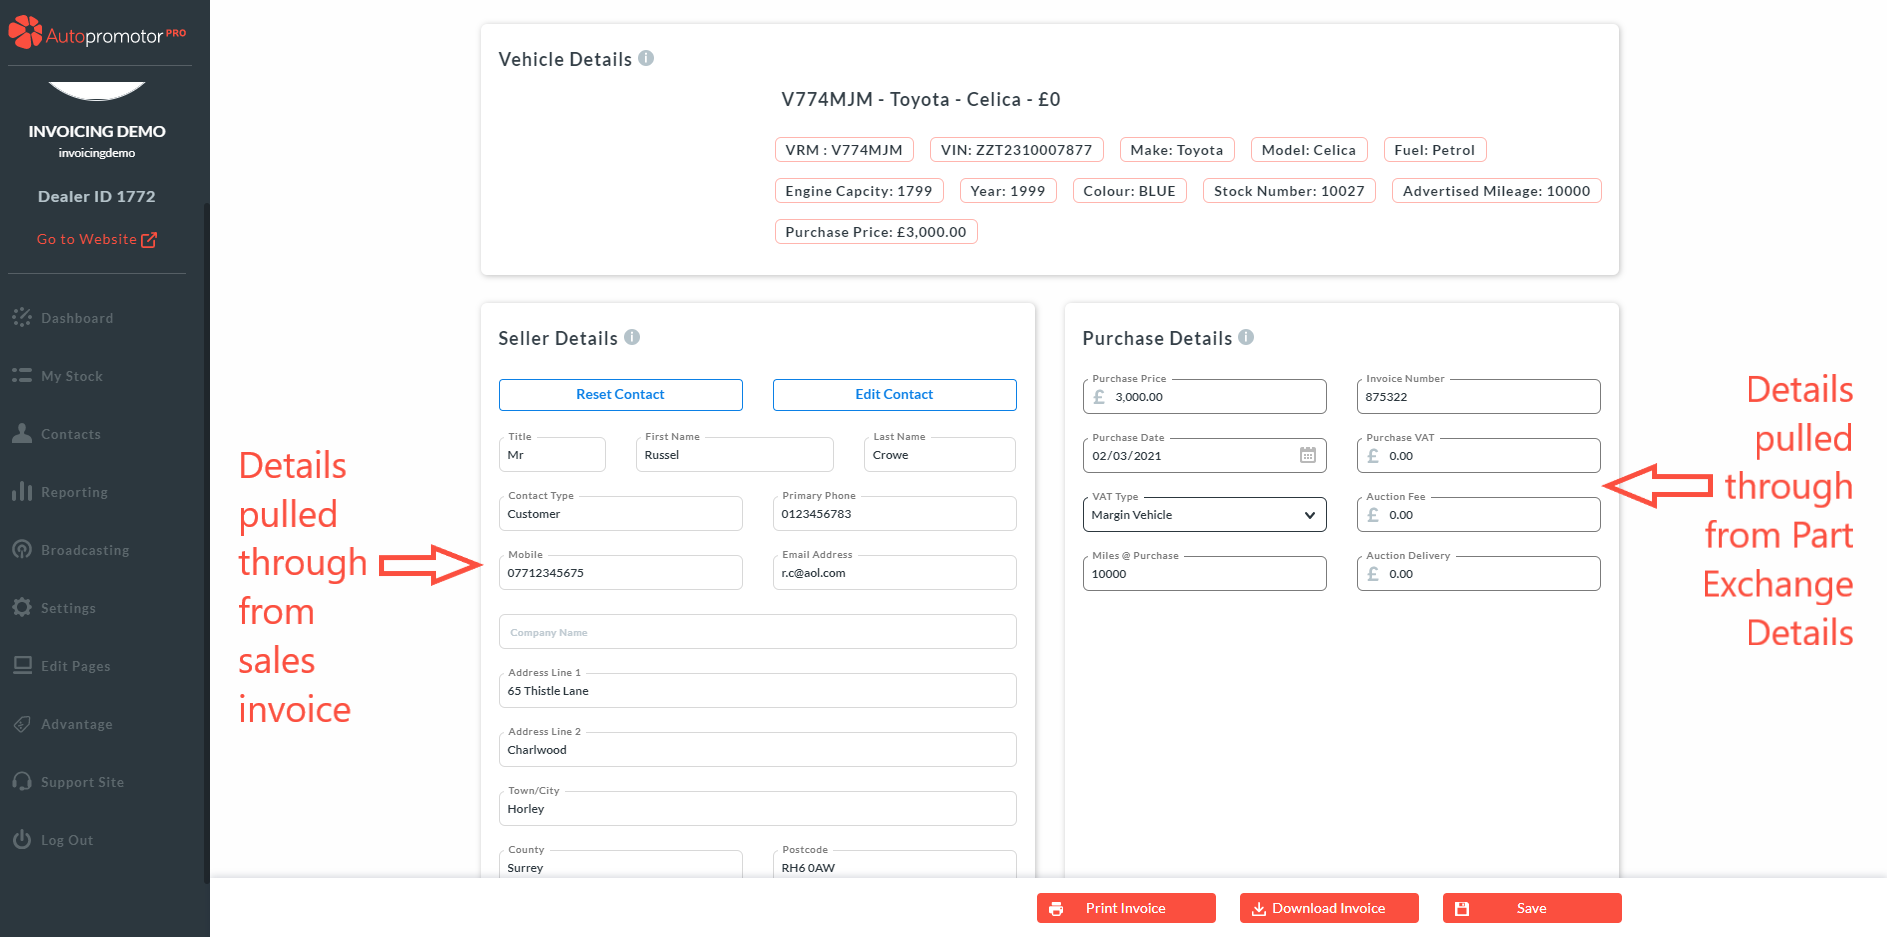
As the vehicle is against the sales invoice, Autopromotor will be able to pull through the seller details and some of the purchase information.
7. Add in any Vehicle Preparation information that the vehicle requires. 8. Click on ‘Save’
You then need to create the advert for the vehicle.
9. Whilst still in the ‘Inactive’ page, hover over the vehicle row and click on ‘Edit’
10. Input all the sale price and add photos of the vehicle (as per the process of advertising a vehicle) 11. Click on ‘Publish’
12. The final step would be to change the status of the vehicle from ‘Inactive’ to ‘Active’