
You are able to put multiple part exchange vehicles on a sales invoice. Follow these steps to find out how to do this.
Step-By-Step Guide:
- Complete Customer Details
- Complete Sales Details
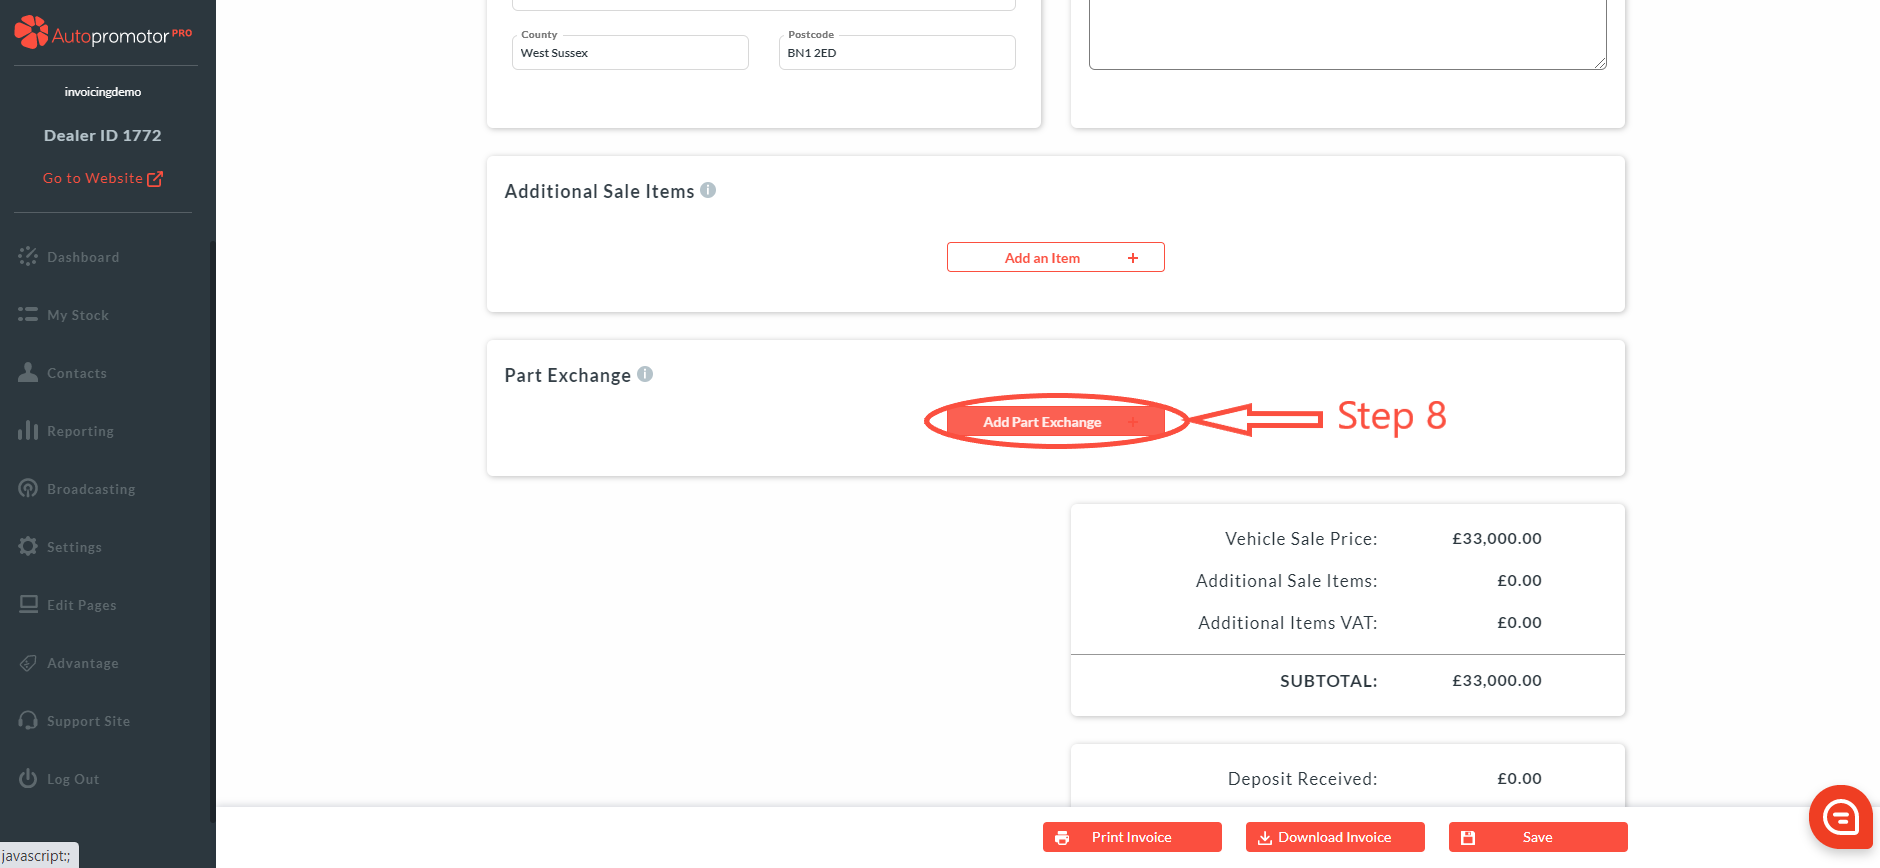
- Scroll down to the ‘Part Exchange’ box
- Click on ‘Add part exchange’
- A pop-up box will appear asking for Part Exchange vehicle details:
- Type in VRM, mileage and allowance you are accepting for the vehicle
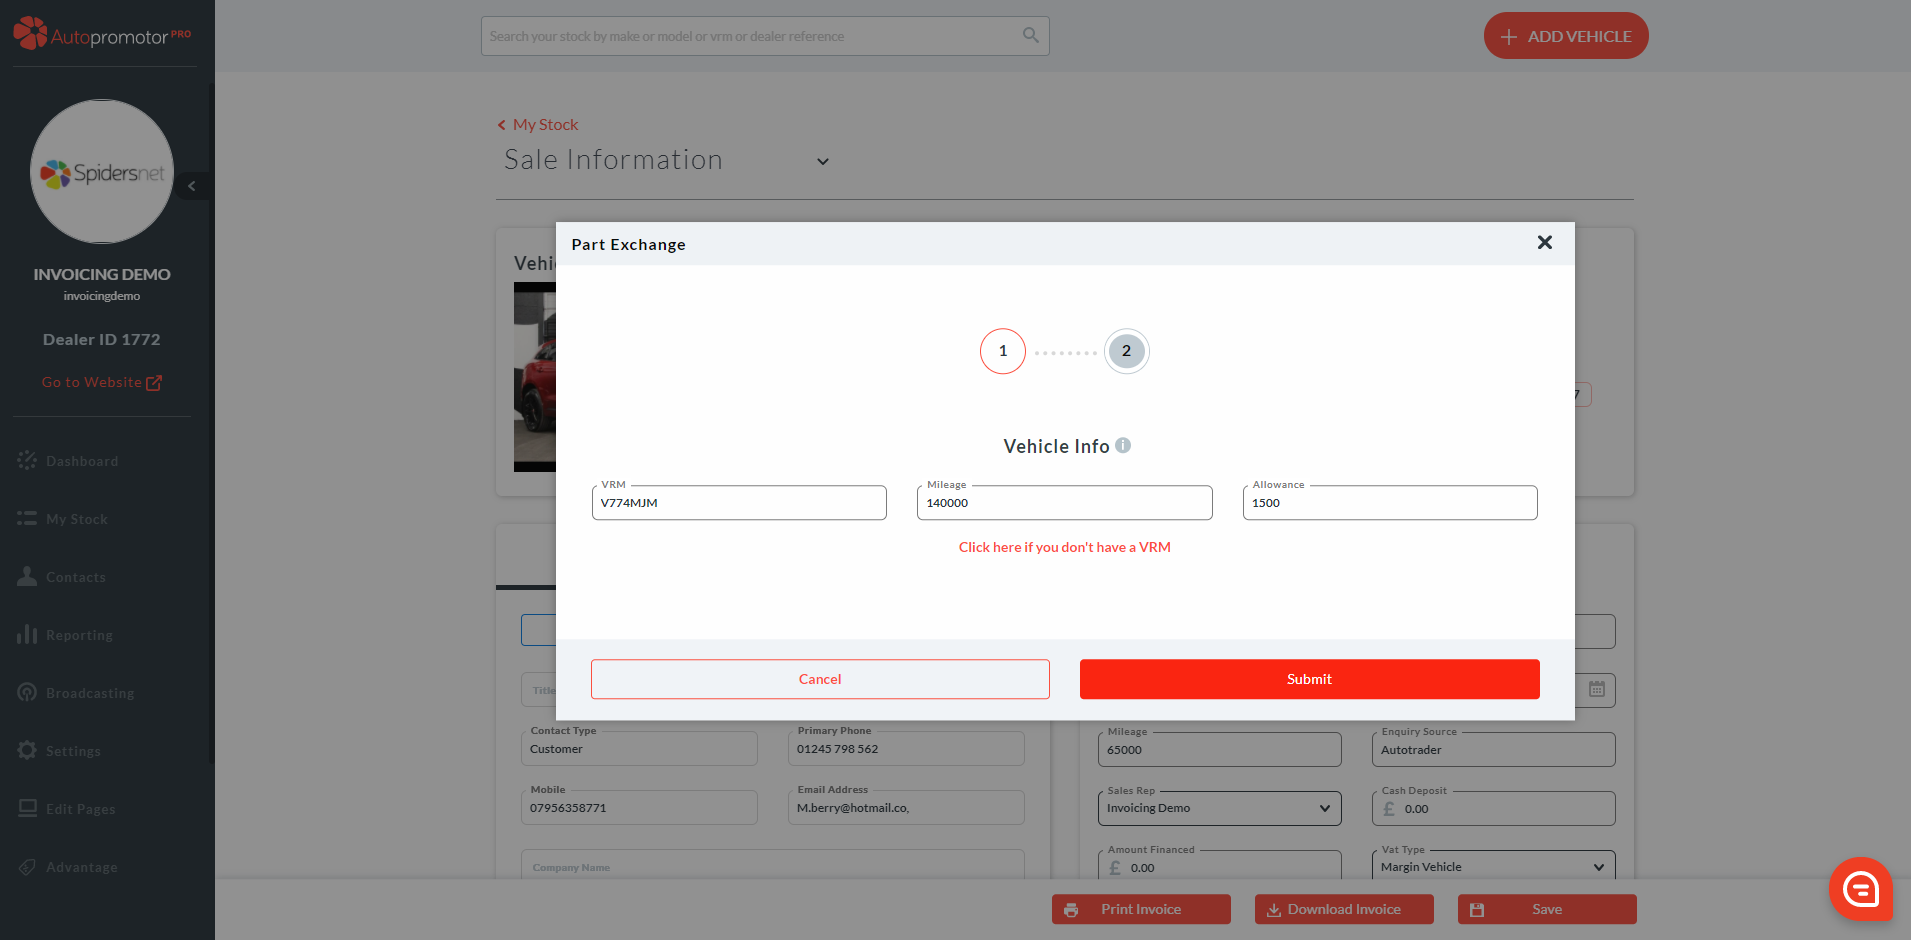
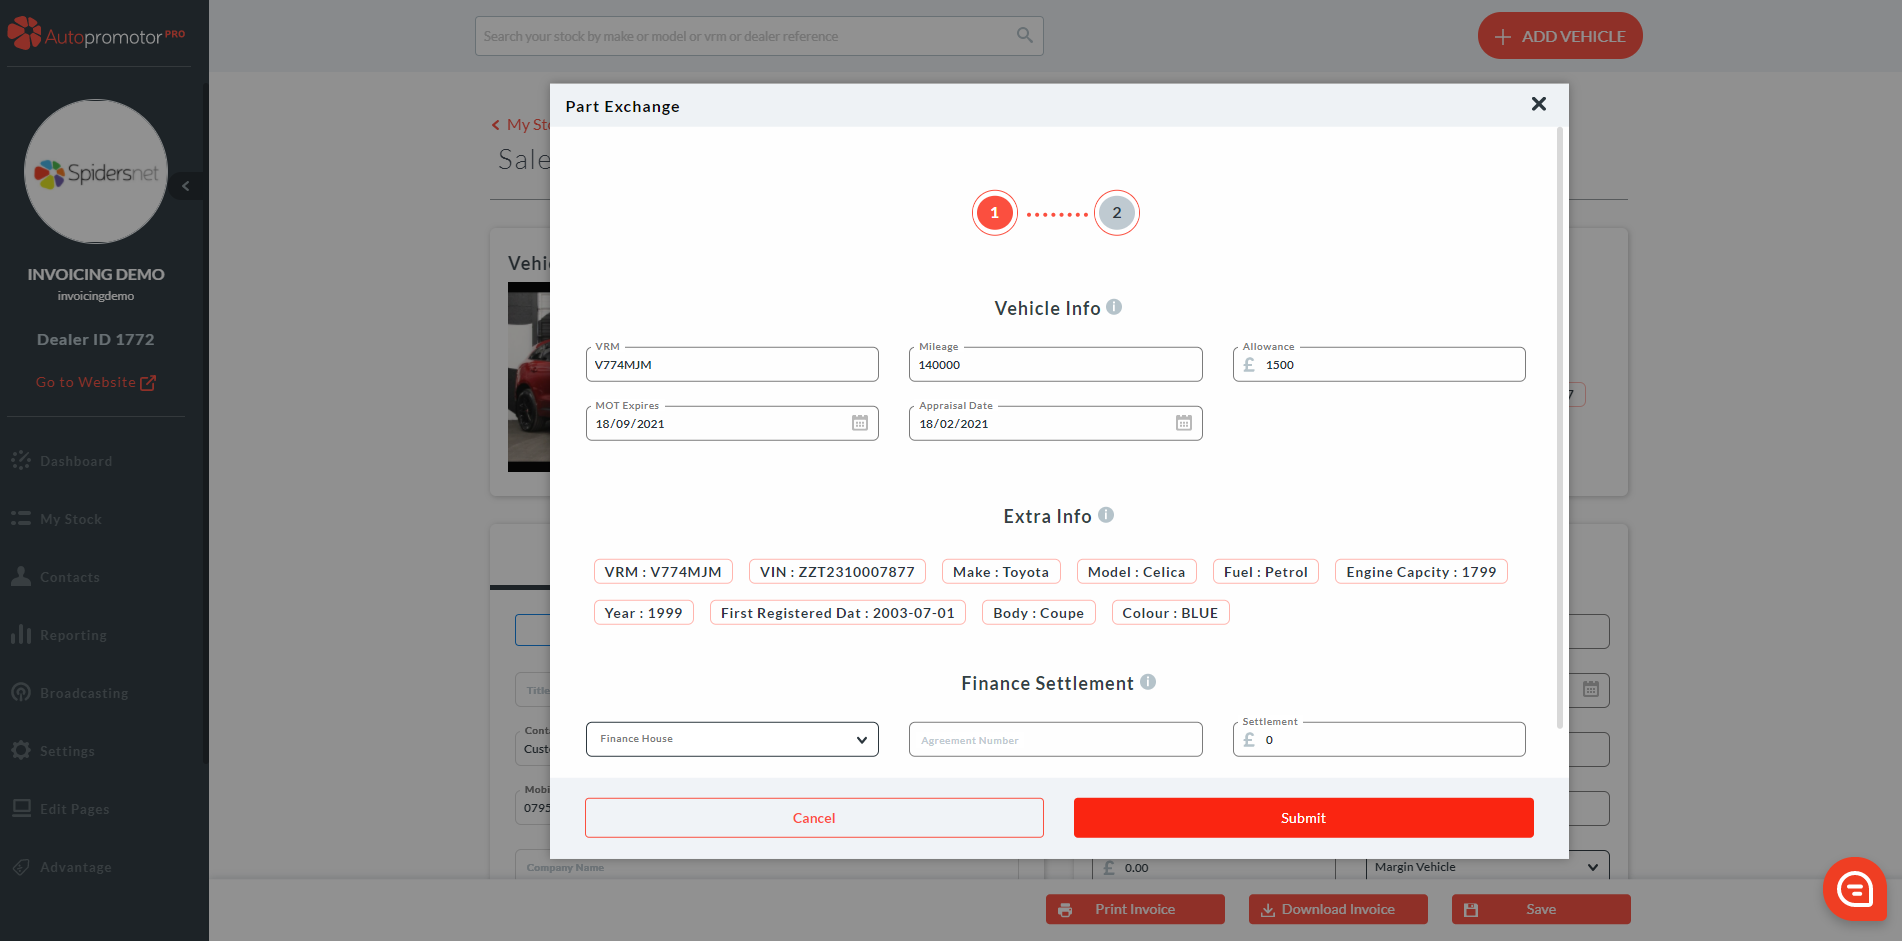
6. Click on ‘Submit’ 7. The VRM lookup pulls through the part exchange vehicle details 8. Click on ‘Submit
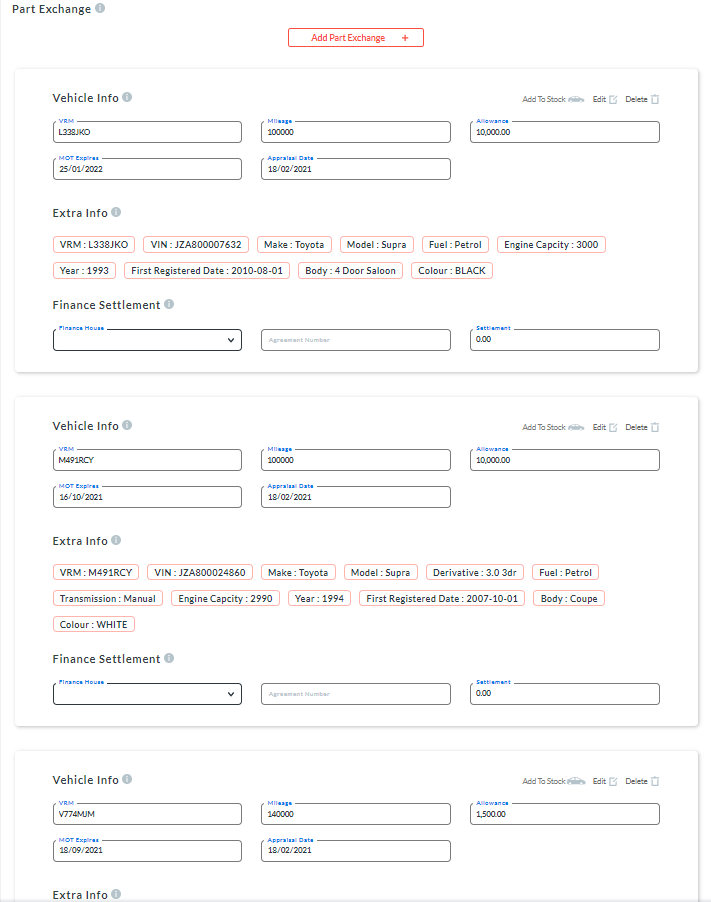
9. The part exchange vehicle will now show up on the sales invoice
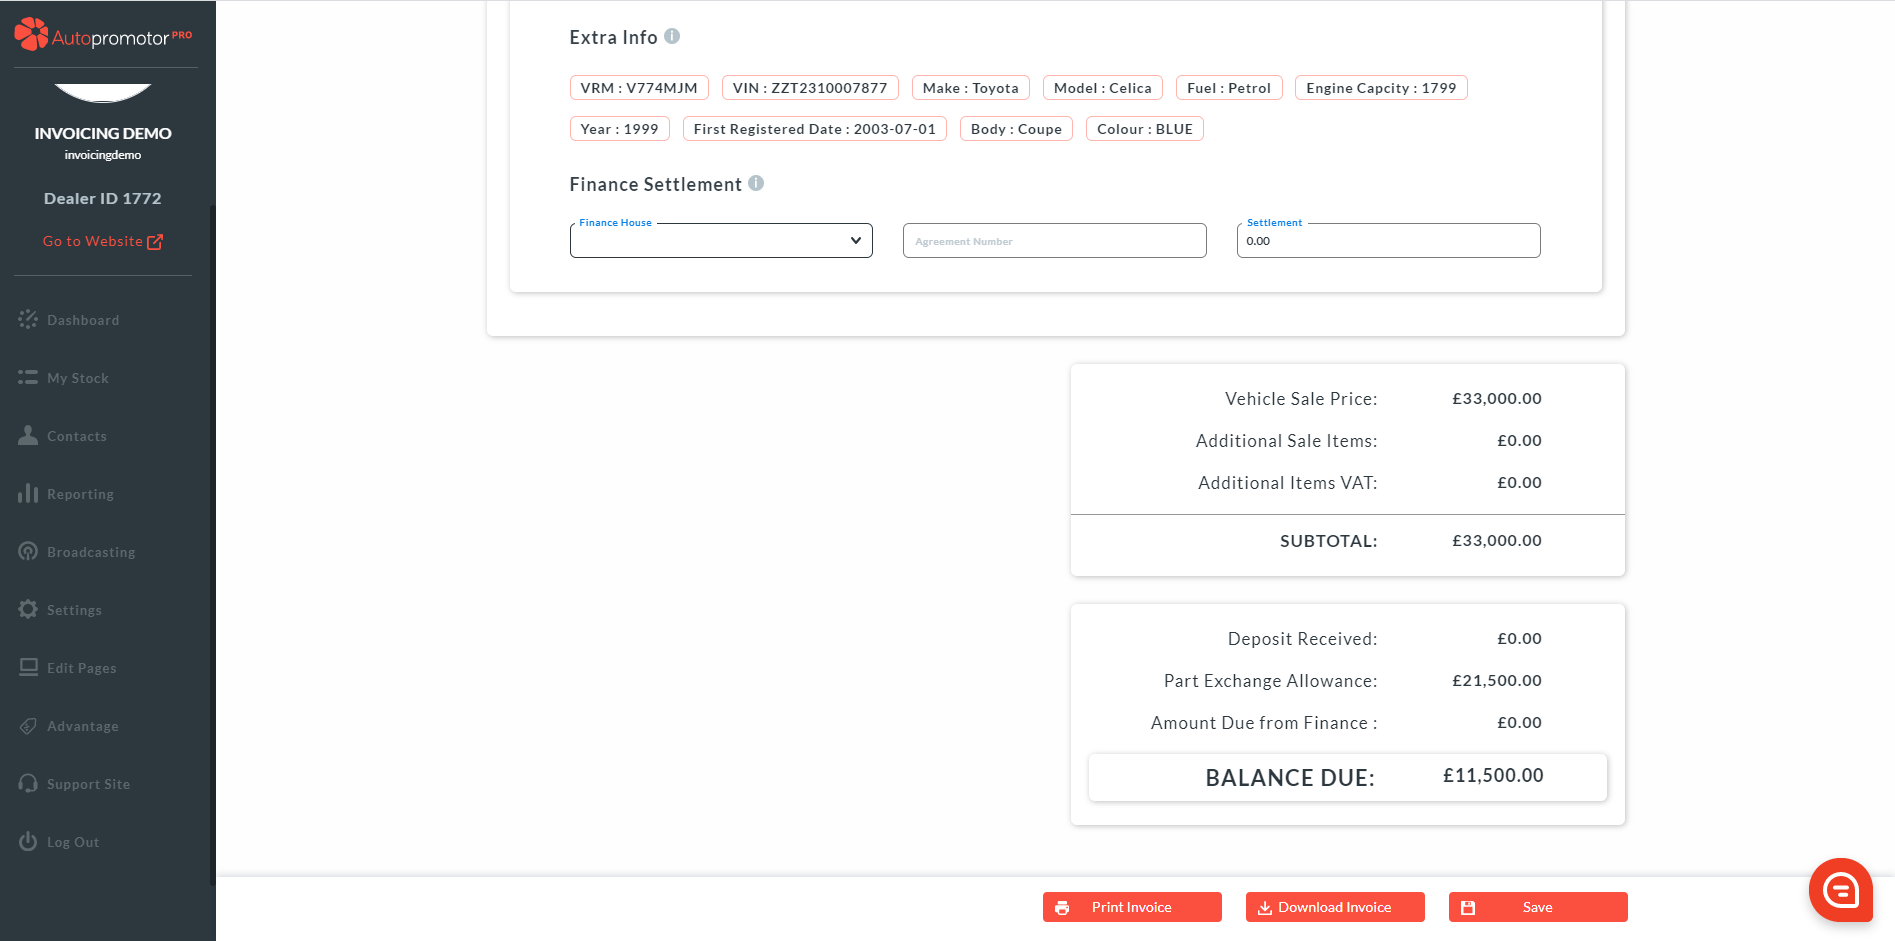
10. Repeat the same process for each part exchange vehicle a. Each part exchange vehicle will show on the sale information screen with their details. b. The sales invoice will adjust the amount left to pay for the vehicle being purchased when each part exchange vehicle is added.
11. Once done, click on ‘Save’